Echo Art Flowers in the Classroom
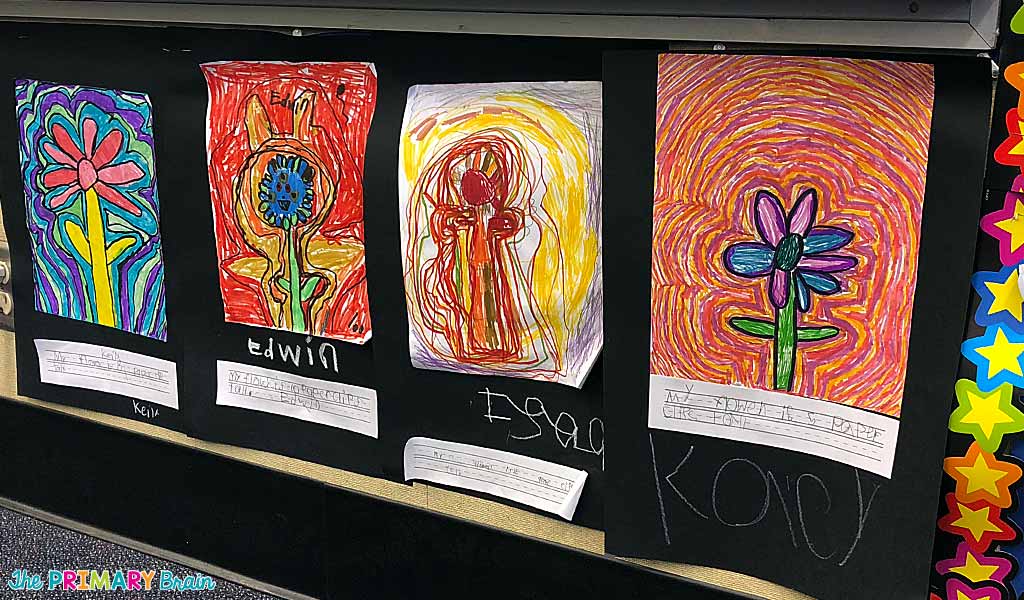
Spring is finally here! I love finding ways to integrate art into content areas such as language arts and math. I cannot think of a better project to welcome spring than by creating echo art flowers through a directed drawing exercise. After completing our flowers, we measured with paperclips since we are working on measurement this week. Each student added a sentence under their artwork that stated how many paperclips tall their flowers were. These flowers definitely make an awesome statement for Open House!
Before you read any further, I feel like I have to tell you… I am NOT an art teacher and have never been strong in art. Soooooooo if you are anything like me, then know that you CAN do this project with your class and be successful! Read my step by step directions below.
How to Create Echo Art Flowers With Your Class
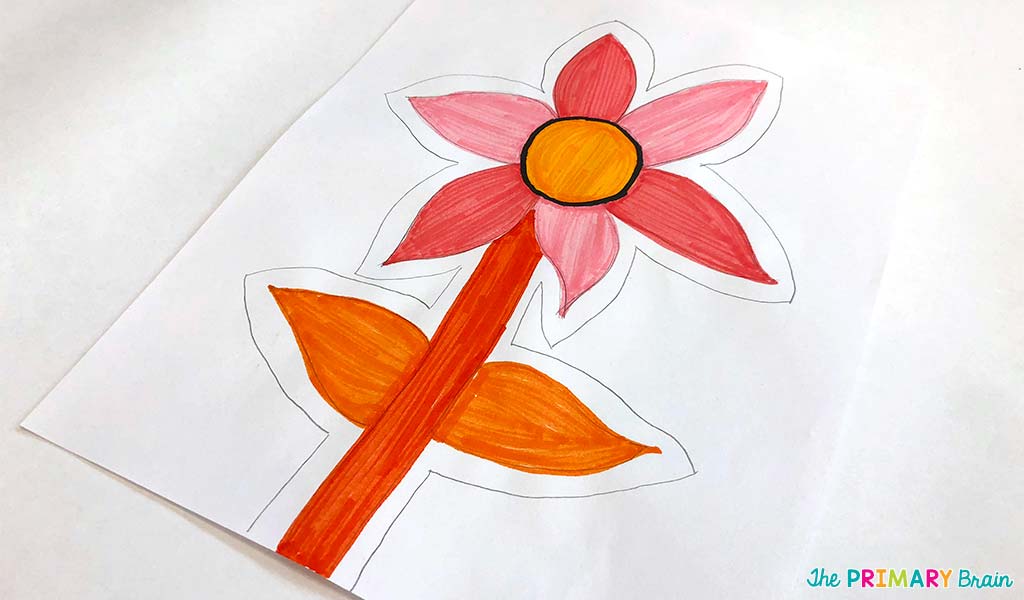
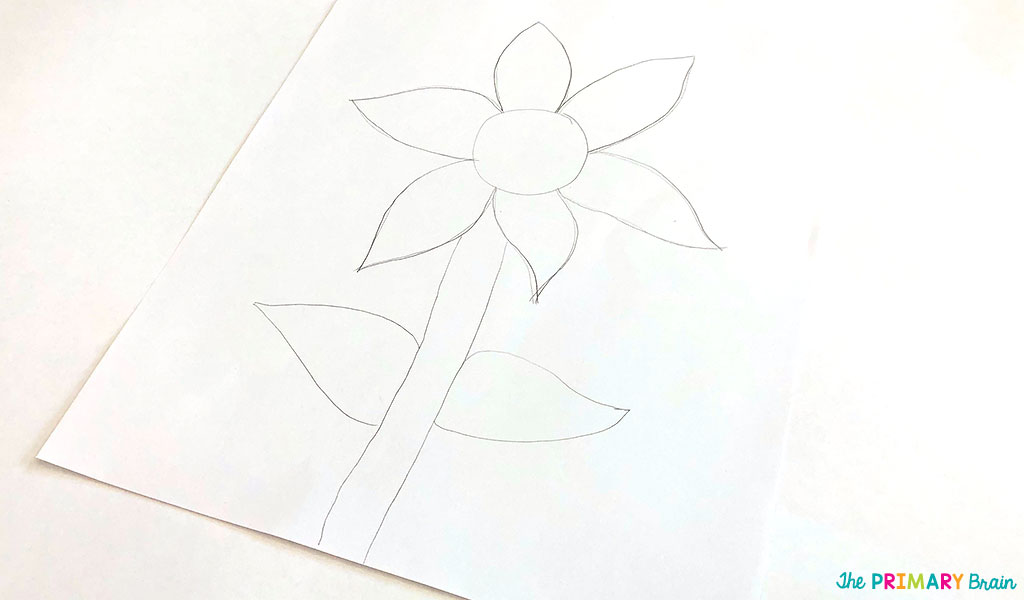 When I began this lesson, we started at the very beginning. I taught each student how to slant their paper, sit with correct posture and hold their pencil. Next, I went through each step of drawing their flower, beginning with the circle in the middle.
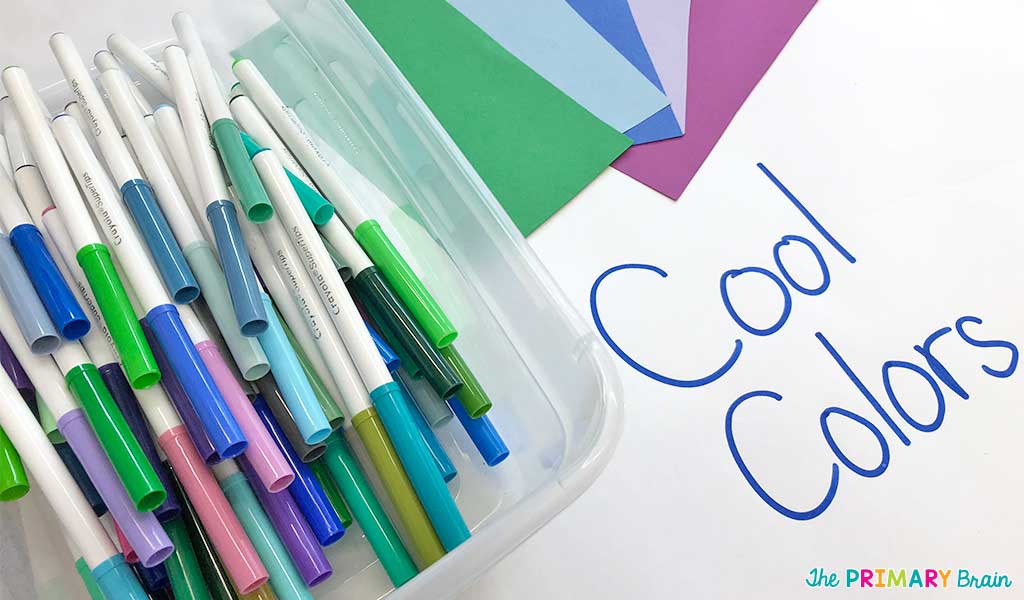
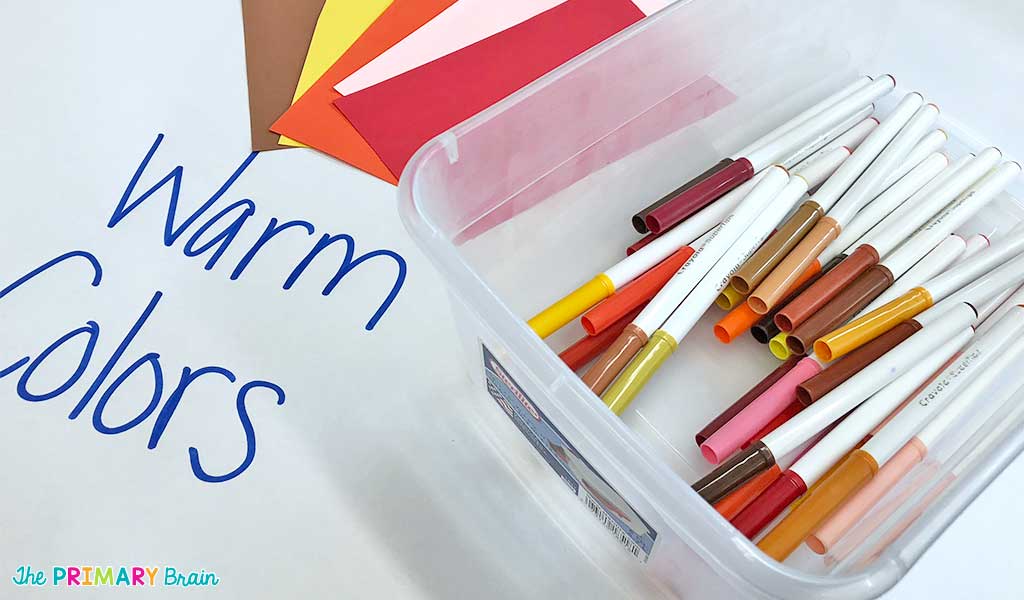 We discussed the difference between warm and cool colors by showing a color wheel. You can easily pull one up online to show your class. I allowed my students the freedom to choose their own marker colors when coloring their flowers. We started by choosing either a warm or cool color palette for the flower, stem, and leaves. My littles were so excited to choose 5 marker colors to use.
I found these AWESOME Crayola Super Tips Markers on Amazon. They are my new favorite markers! You are able to color in small spaces without making any mistakes. My students were SO EXCITED to use the new markers. Click here to grab a box.
After coloring in their flowers, I showed my class how to draw the first ring around their flower. I waited for each student to finish this step before we moved on to coloring the ring.
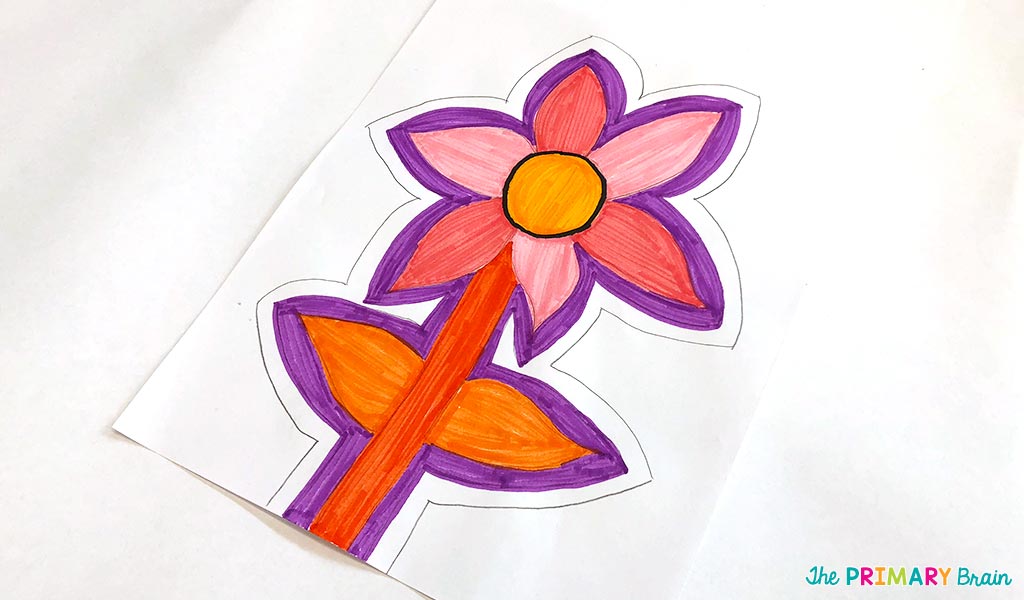
Since I used warm colors for my flower, I used a cool color palette to color in the rings. I had all students return the markers they used for their flowers before they could choose a new set for their echo rings. Once we finished the first ring around the flower, we drew another ring with a pencil.
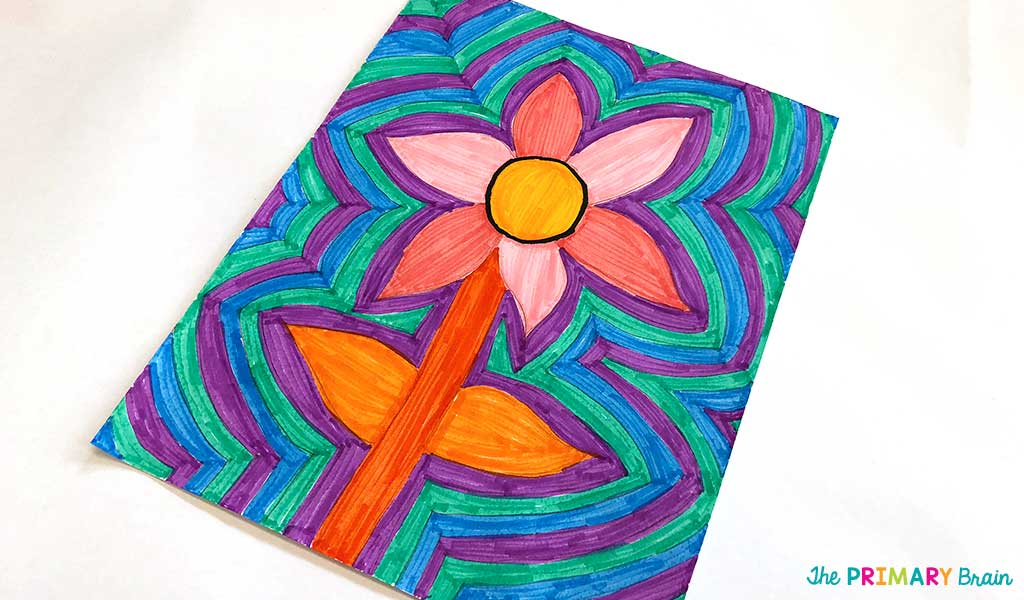
We continued this process until all white space was filled in on the paper.
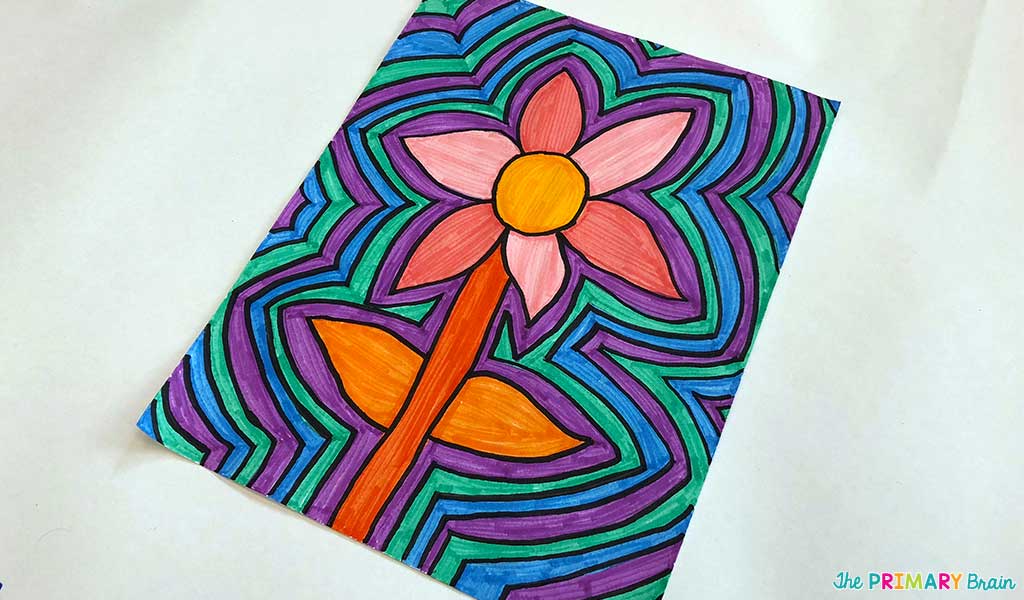
The final step was to take a black marker and trace over all the pencil lines. This really made the artwork pop! We used the same Crayola Super Tips Markers for tracing.
One of my favorite parts of this project was seeing how each student interpreted the flower so differently. Every student created a flower that was completely unique from any other flower in the class. I hope this post has inspired you to create echo art flowers with your class. This is a project I will definitely repeat next year!
Be sure to click here to save to Pinterest to read again later!

This post may contain Amazon affiliate links. I earn a small commission each time someone makes a purchase through one of my affiliate links, which helps to support The Primary Brain blog. As always, I only recommend products that I love and all ideas shared are my own.
Written on March 20th, 2018 by Laurin Brainard